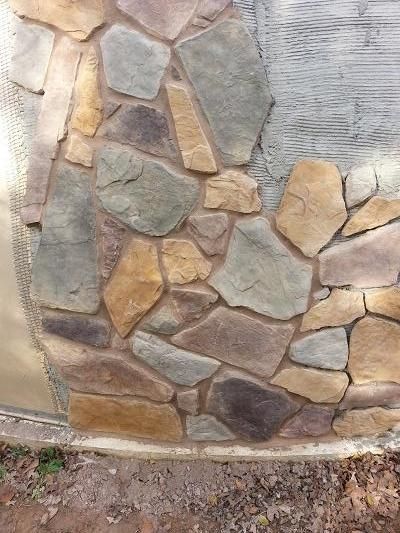
This week we have begun the process of applying rock to the garage. It actually took a few tries to find the right combination of adhesives and techniques to get a good bond in a reasonable amount of time. Once our contractor found the optimum solution I asked him to write up a description of how he did it, in technical terms, in case anyone else would like to cover their dome in the same fashion. Here is his description:
Over the many months I have pondered the best application of applying the veneer rocks to the dome structure. In a normal application, we would seal the house with a house wrap, then secure some metal lath to allow the base for a “scratch coat”. A scratch coat is simply a mortar bed that is installed on a surface as a substrate for stucco or rock veneer. After that substrate has been installed, this allows us to bond our rock to the “scratch coat”. As you know for some time, we have planned to adhere the rock directly to the dome membrane. Seemed like an unusual yet practical approach to such a unique situation. The membrane would act as the moisture barrier, allowing any moisture that penetrated the rock and grout to easily migrate down to the bottom weep holes. As we started off applying various amounts of adhesive, we quickly found that the weight of the rocks was too much for the adhesive. The rock just simply would not stay in the placement we desired. After 30 min there was no measurable adhesion. We even tried samples with several different types of adhesive and even epoxy. With some patience the original adhesive and epoxy did set up enough to hold the rocks. Unfortunately, at that pace it would take us many months to install the rocks.
Even though the rocks did set, this was not an acceptable application. So I decided try a different strategy. We adhered a 1/2” fiberglass mesh that is similar in shape to expanded metal. Because it is fiberglass, it conforms to the shape of the dome easily and does not weigh much. We apply the adhesive in a vertical line so that this does not cause any moisture to be trapped. Once the mesh is set, we have a perfect base to install a “scratch coat” This worked perfectly in out trial area. Once the scratch coat was dry we could then bond the rocks directly to the mortar bed like normal.
In the end, I am very pleased with the application. The color and rock style is a great choice for the home.
If you look closely at the picture you can see the fiberglass mesh on teh left hand edge and the scratch cost in the upper right corner.
I think it looks very nice and will provide a virtually maintenance free exterior for our dome.
No comments:
Post a Comment
Note: Only a member of this blog may post a comment.